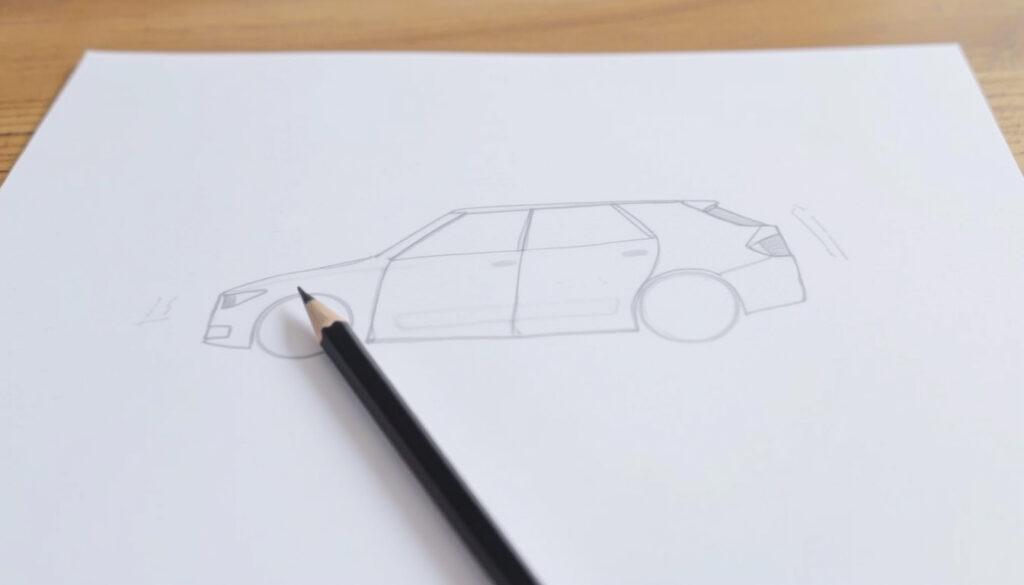
How to Draw a Car for Beginners: The Box Method Step-by-Step
Ever caught yourself doodling a car in the margin of a notebook, only to get stuck at the wheels? This guide uses the box method to turn a complex machine into a sequence of manageable shapes.
Key Facts at a Glance
Stats Line: Most common technique: Box method · Typical number of steps: 5–10 stages · Difficulty level: Beginner-friendly · Required tools: Pencil, eraser, paper, reference photo
Starting with a Simple Box
How to draw a car in 3D?
The most effective way to start is to forget about the car’s personality—the curves, the spoiler, the headlights—and see it for what it is: a rectangular volume. Drawing in 3D means treating that rectangle as a three-dimensional block with depth, height, and width. As Adobe (tutorial) notes, this is where every car drawing begins: with a basic box that defines the overall length and height. It’s a counterintuitive first step because we’re naturally drawn to the details, but the box anchors your perspective and ensures everything else on the page stays in proportion.
You’re not just drawing a rectangle; you’re drawing a three-dimensional block. Think of it as the car’s “bounding box” — a mental fence that contains the entire vehicle. A YouTube tutorial (How to Draw Any Car) reinforces this by explaining that this box is your scaffolding; it’s what guarantees the car doesn’t look like it’s melting or sliding off the page. Start by lightly sketching the overall height and width of the car you’re drawing. This will be the single most important decision you make, as it determines the scale of everything that follows. The envelope technique, as described by Gvaat’s vehicle perspective guide, also starts with a horizon line and vertical to place the box in space.
Start with a simple box to establish proportions. This foundation will help you draw any car.
— How to Draw a Car Using a Simple Box (YouTube tutorial)
The implication: the box gives you a reliable reference grid to measure all subsequent lines against.
The Blueprint: Drawing the Basic Shapes
How to draw a car in computer?
Once your box is in place, it’s time to block in the major sections inside it. Instead of seeing a door or a fender, you’re looking for the “hood,” “cab,” and “tail.” For a beginner, the trick is to see these as distinct, simple shapes that fit together like a puzzle. Adobe’s guide (step-by-step) divides the car into three basic shapes within that initial rectangle. When working digitally, you can use separate layers for the box, the wheels, and the details, making it easier to tweak proportions.
- Hood: The front section, usually lower and flatter.
- Cab: The “greenhouse” where the windows are — often a slightly narrower box sitting on top.
- Tail: The rear section, which can mimic the hood or taper off depending on the car’s style.
Now, before you refine these shapes, you need to map out the car’s “bones.” The Daily Automotive (guide) emphasizes that a bounding box alone isn’t enough—you must mark internal reference points. Don’t draw the wheels yet; instead, mark where they will sit. Identify the wheel centers, the beltline (the line where the windows meet the body), and the roofline. This isn’t just about drawing the outline; it’s about visualizing the car’s mass and how the light will fall on it. By comparing your drawing to the reference image and measuring with your pencil against an angle, you train your eye to see the subtle curves that separate a box from a car. For a step-by-step approach suitable for children, Art Projects for Kids uses basic shapes like circles and rectangles.
What this means: marking reference points early turns the box into a functional map, not just a container.
Shading and Refining: From 2D Box to 3D Object
How to draw a car that is easy and beautiful?
With the proportions set and the basic shapes placed, you’re ready to convince the eye that your flat sketch has depth. This is where shading comes into play. Start by identifying a light source; this was part of the plan from the beginning. As noted in the research, YouTube (car drawing tutorials) often have narrators who emphasize the “car box method” when transitioning to shading. The goal isn’t to smudge everything; it’s to use shadows to suggest the curve of the fender and the reflection on the glass. You shade the darkest areas where the panels meet the ground and the deepest recesses of the wheel wells, leaving the upper body and the glass areas lighter to suggest the car’s reflective paint. To make the drawing easy and beautiful, focus on smooth curves and even shading—Drawabox provides structured exercises for building that control.
A realistic car drawing isn’t about perfect symmetry; it’s about accurate perspective. Even after you’ve refined your box into a recognizable car, you’ll want to keep refining the details of the outline—the subtle fender flares, the angle of the windshield, the character lines along the side. The Daily Automotive (guide) points out that the final step is a critique of your own work: ensure your wheels touch the ground and are proportional to the body. If your car looks like it’s floating, you haven’t shaded the ground shadow beneath it. If it looks like a toy, you haven’t checked that your wheels match your reference. The box was your foundation; this final check is what makes the car look like it belongs on the road.
The catch: shading without proportion is like painting a crooked wall—the depth can’t fix a warped structure.
Common Pitfalls and How to Avoid Them
How to draw a car for class 1?
Every artist, no matter how skilled, started with a lopsided car. The journey is filled with persistent errors, but knowing what they are in advance can save you a lot of erasing. The most common mistake, echoing the research, is “wheels not aligned or too small.” This almost always traces back to skipping the initial proportion stage. The second most common issue is a “stiff and lifeless” appearance, which is often the result of paying too much attention to the basic shapes and not enough to the subtle curves that flow from the box’s sharp edges. For a younger audience (class 1 level), the key is to use the simplest shapes: a big rectangle for the body, two circles for wheels, and straight lines for windows. Keep the number of steps under 8 and let creativity shine with bright colors.
- Wheels too small: You measured the box, but forgot that the wheels are the largest part of the car’s mass.
- Wheels not aligned: One is drawing the “car box” but not the “car box” as a single unit; each wheel must be drawn in relation to the others.
- A “floating” car: Forgetting to add a ground shadow, or shading the bottom edge of the tires.
- Ignoring the ellipses: Drawing wheel hubs as perfect circles when they should be ellipses to convey the car’s turning angle.
The most reliable way to beat these issues is to use a mirror or flip your drawing. A quick look in a mirror will instantly show you if the car looks like it’s leaning or if the wheels are off-balance. This is your edit phase. Go back to your reference photo, measure the gaps between the wheels and the fender, and cross-check your beltline.
The pattern: every correction starts with comparing your drawing to the reference, using the box as a ruler.
The “How-To” Blueprint: Step-by-Step Practice
How to draw a car Bugatti?
So, how do you actually start a drawing? The process is more reliable than you think, and it is not as complex as most tutorials suggest. The “beginner box” method is your safest starting point, and it’s not just for newbies. Even experts use this when they’re sketching a complex car from memory. The key is to practice it over and over until it feels like second nature. When drawing a specific model like a Bugatti, apply the box method to capture its low, wide stance and pronounced curves—the horseshoe grille and flowing body lines can be added after the basic box is refined.
- Find your reference: Use a side photo of a car you like. The side profile is the easiest to start with because it limits your sketching to 2D. Draw a rectangle around the car in the photo.
- Draw the box: On your paper, sketch the same rectangle. Keep it light—you will be erasing a lot. Within this box, divide the car’s overall height into roughly a 2:1 ratio, with the bottom half being the body and the top half the cabin/windows.
- Block in the basic wheels: Lightly sketch in the wheel centers and a rough circle for the wheels. Make sure they are evenly spaced within the box. The wheelbase (distance between the centers) will be the car’s most defining proportion.
- Connect the shapes: Draw a soft line from the bottom of the front wheel to the front, up over the hood, across the hood to the windshield. Then draw the roofline, the rear window, and down the trunk.
- Refine the outline: Now, look at the negative space between the car and the edge of your box. This is where the magic happens. Adjust the curves until they match your reference. Erase the internal construction lines that are no longer needed.
- Details and shading: Draw the door lines, the side mirrors, and the headlights. Then start to add a little shading under the car and inside the wheel wells.
The steps are a loop, not a one-way street. You’ll bounce back and forth between steps, refining the shape as you go. The Youtube tutorial on the “Box Method” (realistic car) breaks this down further. By focusing on the overall mass before you even consider the headlights, you’re setting yourself up for success.
The implication: repetition of this workflow builds muscle memory, making the box method second nature.
From Lines to Life: Turning Your Sketch into a Presentation
How to draw a car that is easy and beautiful?
After a few practice attempts, you realize that the box method is less about drawing cars and more about training your eye. It is about the translation of 3D objects onto a 2D plane. And once you conquer the box method, you can approach any car on the road and know exactly where to start. But how do you know if your drawing is ready for the next step? Look at your piece from a distance. If the car feels balanced and grounded, you have nailed the box method. If the car still looks like it is just a collection of shapes, you need to go back and review your shading and the connections between those shapes. This is the essence of the process, and it’s exactly why the box method is the skeleton of every great car drawing.
Indeed, a final check for “realism” comes not from the perfection of the hood, but the interaction of the car with the ground and the accuracy of its proportions. A neat trick from professional car concept artists is to flip the drawing upside down. This instantly breaks the “face” bias your brain has and forces you to see the shape and negative space. This is a quick test to see if you’ve truly drawn what you see—a key part of the box method model. This workflow—box, main volumes, wheels, refine—is the secret recipe professional sketchers and automotive designers use to quickly work out their ideas on paper before they even touch a computer. This foundation is what separates a doodle from a study.
Everything starts with seeing the car as a simple, three-dimensional block of clay, and the rest is just carving out the details from that block and placing it in space. This is the fundamental lesson for anyone picking up a pencil.
— A common perspective from the drawing tutorials featured in this guide.
What this means: the box method is not just a starting point but a continuous quality check that ensures your drawing stays grounded.
youtube.com, youtube.com, youtube.com, youtube.com, youtube.com, youtube.com
Frequently asked questions
Can I draw a car without a reference?
Yes, it is possible to draw a car from imagination, but it is far more difficult and the box method becomes even more critical. When drawing from memory, you rely on your ability to hold the proportions in your head. The box acts as your logical anchor to keep the car from becoming distorted.
What’s the best pencil to use for the box method?
A standard HB pencil is the best starting point for sketching your initial box because it is light enough to erase easily. As you add shading and details, a 2B pencil will give you the darker values and softer edges you need for the car’s body.
Is the box method only for beginners?
No. While it is the most accessible way for a beginner to start, the logic of the box—establishing the major masses and bounds—is the same principle used in professional automotive design. It is the standard foundational step used for all but the most gestural of sketches, and it’s how you get even proportions.
How do I get the wheels to look right?
The wheels give away an amateur drawing immediately. After setting your box, you must find the wheel centers before you do anything else. This division is where most beginners fail. Ensure the wheels have the correct height (they should be at least 1/3 of the total car’s height) and be drawn as ellipses, not perfect circles.
Should I use a grid?
The box is essentially a variable grid. Using a precise grid on your reference photo and matching it to your drawing paper is a great way to train your eye, but it can also make the drawing look stiff. The box method is a happy medium: it gives you the guide of a grid but the flexibility of freehand drawing.
More related posts
 The Batman Part II: Cast, Villain Rumors, 2028 Release
 Barry Keoghan and Sabrina Carpenter Relationship Timeline
 Richest Country in the World 2026: GDP, Wealth & Per Capita
 Florida AG Held in Contempt – Ruling Details and Timeline
 iPhone 14 Pro Max Price – Lowest Used Deals From $416
 2 Quarts to Cups Conversion: How Many Cups in 2 Quarts
 Poker Face TV Series: Season 3, Cast & Where to Watch
 2026 Winter Olympics Closing Ceremony: Date, Time & Performers