How to Boil an Egg – Perfect Soft, Medium and Hard Results
Boiling an egg may seem straightforward, but achieving the perfect texture—whether soft, medium, or hard—requires understanding a few key variables. Water temperature, cooking time, and egg freshness all play critical roles in determining whether your result features a runny yolk, a jammy center, or a fully set one.
This guide covers the science and technique behind boiling eggs, providing exact timings, step-by-step instructions, and solutions to common problems like cracking shells and green-ringed yolks. Whether you need eggs for a breakfast dip, a salad topping, or classic deviled eggs, the method outlined here delivers consistent results.
How Long to Boil an Egg for Soft, Medium, or Hard?
The most frequently asked question about boiling eggs involves timing. Doneness depends entirely on how long the eggs remain in boiling water, with each stage producing a distinctly different texture.
All boiling times begin once the eggs are submerged in actively boiling water. Lower the heat slightly after adding eggs to maintain a gentle boil without excessive bubbling that could cause cracking.
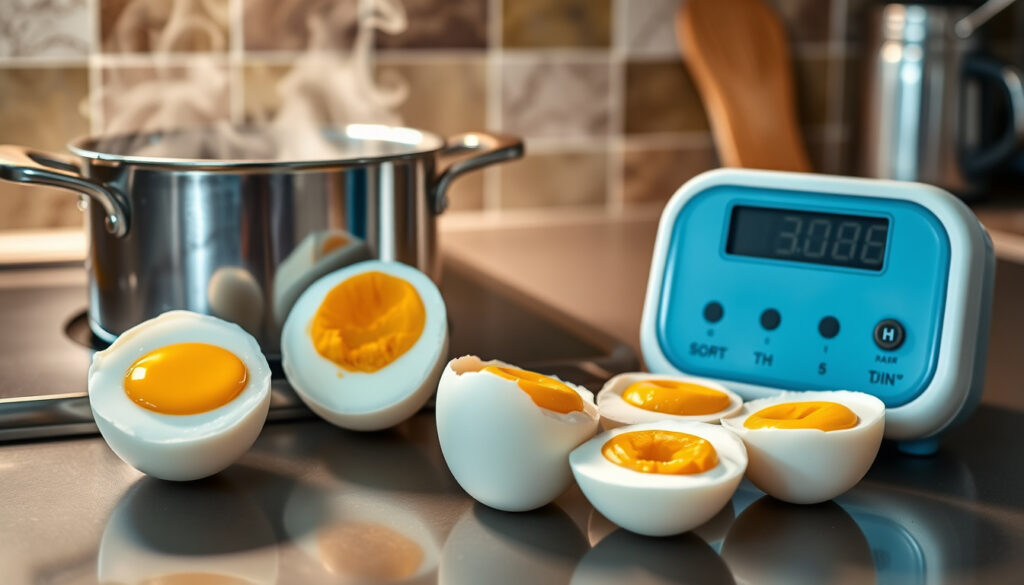
6 minutes
Runny yolk
8 minutes
Jammy yolk
10–12 minutes
Firm yolk
Ice bath
Easy peeling
Hot start method—dropping fridge-cold eggs into already-boiling water—offers the most control over doneness. Soft-boiled eggs reach runny perfection in about 6 minutes, while medium-boiled eggs with jammy centers require approximately 8 minutes. Hard-boiled eggs with fully set yolks need 10 to 12 minutes in the pot.
Fridge-cold eggs perform more reliably than room-temperature ones because their starting point remains consistent. Room-temperature eggs cook faster, which can lead to overdone results even with the same timer.
Key Factors That Affect Boiling Times
- Egg size: Larger eggs require an additional 1–2 minutes
- Starting temperature: Cold eggs need more time than room-temperature eggs
- Altitude: Higher elevations lower water’s boiling point, potentially requiring extended times
- Pot size and water volume: More water takes longer to return to a boil after adding eggs
- Altitude adjustments may add roughly 1–2 minutes per 3,000 feet of elevation
- Always test one egg first when trying a new pot or batch
| Doneness | Time (Hot Start) | Yolk Texture | Best Used For |
|---|---|---|---|
| Soft | 4–6 minutes | Runny | Breakfast dip, soldiers |
| Medium | 7–9 minutes | Jammy | Salads, grain bowls |
| Hard | 10–12 minutes | Firm | Deviled eggs, snacks |
Step-by-Step: Best Way to Boil Eggs Perfectly
The method you choose for placing eggs into boiling water significantly impacts the final texture and ease of peeling. Most cooking experts recommend the hot start approach, which involves bringing water to a boil before adding cold eggs from the refrigerator.
Hot Start Method
Fill a medium pot with enough water to submerge eggs by at least one inch. Bring the water to a rolling boil over high heat. Using a spoon or slotted utensil, gently lower fridge-cold eggs into the boiling water one at a time. Reduce the heat slightly to maintain a gentle boil, then start your timer according to your desired doneness.
For soft to medium textures, this method provides excellent control over yolk consistency. After timing, transfer eggs immediately to an ice bath to halt carryover cooking.
Cold Start Method
Some cooks prefer placing eggs in cold water and bringing the pot to a boil together. Once the water reaches a boil, cover the pot and remove it from heat, letting eggs finish cooking in the residual heat for 9–12 minutes for hard-boiled results. This technique reduces cracking risk but offers less precise control over yolk texture.
The cold start approach works better for hard-boiled eggs destined for peeling, though the hot start remains the preferred method overall for consistent results.
Should You Add Vinegar?
Adding a tablespoon of vinegar to the boiling water serves two purposes. It helps reduce the sulfur smell that some people find unpleasant, and it can assist in coagulating egg proteins if a shell cracks during cooking, keeping the egg intact rather than leaking into the water.
Egg whites coagulate between 144–149°F (62–65°C), while yolks set at 149–158°F (65–70°C). Boiling water at 212°F (100°C) penetrates the shell rapidly, making precise timing essential for achieving your desired texture.
How to Peel Hard Boiled Eggs Easily Every Time
Peeling hard boiled eggs ranks among the most frustrating kitchen tasks when shells stick to the whites. Several factors determine how easily an egg peels, and addressing each one leads to frustration-free results.
Why Fresh Eggs Stick to Their Shells
The age of your eggs matters significantly. Fresh eggs have a smaller air pocket between the shell and membrane, with the albumen adhering tightly. As eggs age, the air pocket grows and the membrane loosens from the shell, making peeling considerably easier.
If you regularly boil eggs, consider using older eggs purchased closer to their expiration date. The USDA confirms that eggs remain safe to eat for several weeks past their sell-by date when refrigerated properly.
The Ice Bath Method
Immediately after cooking, transfer eggs to an ice bath consisting of ice and cold water. This temperature shock accomplishes two things: it halts residual cooking that could lead to overdone yolks, and it causes the inner membrane to contract away from the shell.
According to cooking instructions verified by kitchen tests, hard-boiled eggs should chill in the ice bath for at least 14 minutes before peeling. Soft and medium-boiled eggs require only 2–3 minutes in the ice bath.
Peeling Techniques That Work
- Peel eggs under cool running water—the stream loosens shell fragments
- Crack the wide end first, where the air pocket provides a natural starting point
- Roll peeled eggs gently between your palms to remove any remaining shell bits
- Steam method: Place eggs in a steamer basket for 15–20 minutes, then cool under running water
Farm-fresh eggs or those purchased within a few days of packing will stick badly to their shells. If peeling proves difficult, the eggs are simply too fresh—look for dates closer to expiration or purchase eggs a week or two before boiling.
Common Problems: Cracking, Green Yolks, and Fixes
Even experienced cooks encounter issues when boiling eggs. Understanding the causes behind common problems helps prevent them from occurring in the first place.
Why Eggs Crack During Cooking
Thermal shock causes most cracking. Dropping cold eggs directly into boiling water creates a rapid temperature differential that stresses the shell. The vigorous bubbling from a rolling boil also traumatizes the eggs mechanically.
Solutions include gently lowering eggs using a spoon rather than dropping them, starting with fridge-cold eggs, and reducing heat slightly after adding eggs to minimize bubbling. Some cooks also prick the wide end of each egg with a pin to allow steam to escape. To avoid cracked eggs, gently lower them into the water, start with fridge-cold eggs, and reduce heat after adding them, or learn more about PCOS symptoms causes and treatment.
The Green Ring on Yolks
That unattractive green or gray ring forming around a yolk results from overcooking. When eggs cook too long, the iron in the yolk reacts with sulfur compounds in the white, creating ferrous sulfide at the yolk’s surface.
Precise timing and immediate ice bathing prevent this problem entirely. Once eggs reach their target doneness, the ice bath stops carryover heat from continuing to cook them. Cooking experts recommend removing eggs the moment timing completes and plunging them into ice water.
Overcooked Eggs
Beyond green rings, overcooked eggs develop rubbery whites and dry, chalky yolks. The difference between perfectly cooked and overdone can be as little as one minute, highlighting the importance of accurate timing.
Using a timer eliminates guesswork. Even 30 seconds past the ideal time can noticeably affect texture, especially for soft and medium-boiled eggs where the margin for error remains small.
The Boiling Process: From Pot to Table
- Fill a pot with water at least one inch above the eggs
- Bring water to a rolling boil over high heat
- Gently lower cold eggs into boiling water using a spoon
- Reduce heat slightly to maintain gentle boiling
- Start timer according to desired doneness (6–12 minutes)
- Prepare ice bath while eggs cook
- Transfer eggs immediately to ice bath when timer completes
- Let eggs cool for 2–14 minutes depending on final use
- Peel gently under cool running water or in a bowl of water
- Refrigerate any eggs not served immediately
Eggs boiled for storage should cool completely in the ice bath before refrigeration. According to food safety guidelines from the FDA, hard-boiled eggs kept refrigerated maintain quality for up to one week when stored in their shells or peeled in a covered container.
What to Know and What Remains Uncertain
- Soft-boiled: 6 minutes (runny yolk)
- Medium-boiled: 8 minutes (jammy yolk)
- Hard-boiled: 10–12 minutes (firm yolk)
- Hot start prevents cracking
- Ice bath halts carryover cooking
- Older eggs peel more easily
- Green yolk indicates overcooking
- Refrigerate within 2 hours
- Altitude adjustments remain unconfirmed
- Egg size affects timing by ±1–2 minutes
- Room temperature eggs cook faster
- Pot size influences heat recovery
- Exact high-altitude times vary by source
- Optimal vinegar amount not standardized
The Science Behind Perfect Boiled Eggs
Understanding the chemistry involved clarifies why certain techniques produce better results. Egg whites contain proteins that begin coagulating at 144–149°F (62–65°C), while yolk proteins require slightly higher temperatures between 149–158°F (65–70°C) to set.
Boiling water reaches 212°F (100°C), well above both thresholds. The hot start method minimizes uneven heating by surrounding eggs with already-hot water, whereas cold start introduces eggs into gradually warming water where temperature differentials develop more slowly.
Older eggs develop a more alkaline environment as carbon dioxide escapes through the shell’s pores. This higher pH weakens the bond between the albumen and the inner membrane, explaining why aged eggs release their shells so much more readily than fresh ones.
Expert Sources and Recommendations
“The difference between a hard-boiled egg and a perfectly cooked one often comes down to timing and temperature management. An ice bath is not optional—it’s essential for stopping the cooking process at precisely the right moment.”
— Kitchen testing protocols recommend ice baths for all boiled egg applications
Multiple sources confirm that proper food safety practices require refrigerating eggs promptly and consuming boiled eggs within one week. The USDA and FDA guidelines emphasize that eggs belong in the refrigerator at or below 40°F and that cooked egg dishes should not sit at room temperature for more than two hours.
Moving Forward: Storage and Next Steps
Once you’ve mastered the basic boiling technique, the possibilities expand considerably. Hard-boiled eggs form the base for numerous recipes including deviled eggs, egg salads, and grain bowls. Properly stored eggs remain safe for up to one week in the refrigerator.
For those interested in exploring alternative cooking methods, sous vide preparation offers even more precise temperature control, though traditional boiling remains the fastest and most accessible approach for most home cooks.
If you encounter technical issues while accessing this recipe guide online, refer to Plugin Not Working in WordPress – Step-by-Step Troubleshooting for assistance. For information about other dietary considerations, consult the guide How Much Caffeine Is Too Much – Safe Limits by Age and Group.
Frequently Asked Questions
How should I store hard boiled eggs?
Refrigerate peeled or unpeeled hard boiled eggs in a covered container for up to one week. Eggs should cool completely before refrigeration and remain at or below 40°F.
Do I need to adjust boiling times at high altitude?
Water boils at lower temperatures at higher elevations, which may require extending cooking times by approximately 1–2 minutes per 3,000 feet. However, specific high-altitude adjustments remain poorly documented in most sources.
Should I add vinegar to the boiling water?
Adding one tablespoon of vinegar per quart of water helps reduce the sulfur smell and can coagulate proteins if shells crack during cooking, preventing egg contents from leaking into the water.
Can I boil eggs that are not refrigerated?
Refrigeration is strongly recommended for raw eggs before cooking. The USDA advises keeping eggs refrigerated to minimize bacterial growth, and this practice should continue after boiling for food safety.
Why do my eggs stick to the shell?
Fresh eggs stick because the albumen adheres tightly to the inner membrane. Older eggs develop larger air pockets and looser membranes, making them significantly easier to peel.
More related posts
 Imagine Credit Card Login – Official Guide to Secure Access
 Iris by Goo Goo Dolls: Meaning, Movie, Popularity & More
 Where to Watch 28 Days Later: 2024 Streaming Guide
 What Is Gen Z? Age Range, Meaning, and Characteristics
 Union Station Kansas City: Guide to Attractions, Pricing & More
 How Many Gigabyte in a Terabyte? (1000 v 1024 GB)
 Scooby-Doo Mystery Incorporated: Cancellation & LGBTQ Guide
 Profit and Loss Statement: How to Create, Template & Examples